Showing posts with label frame. Show all posts

Tuesday, June 2, 2026

Framing my fishes

Instead of the traditional paper on paper mounting, I shall be mounting my painting on clear plastic pane.  The gist of this painting is to play with light.  Had the painting been mounted on paper and presented in a regular picture frame, the work is denied the interaction with any light from behind the painting and therefore defeats my purpose.

Dry mounting with silicone paper shall be the chosen method this time. This is done by using heat to attach silicone paper to the back of the painting.  The silicone acts as a bonding agent in this scenario. 

A mat cutter is used to trim my painting.  This setup assures a straight line and square up cut. 


The exact placement of the painting on the plastic pane is marked on blue protective film that came with the plastic.  This film will be peeled off and discarded after the mounting is done.  It is a convenient way of marking the lines without defacing or having to clean the clear plastic afterwards.


I have remnants of silicone paper that I can piece together to cover the entirety of my painting. Hate to see them go to waste.  My hobby heating iron supplies the heat needed to melt the silicone.  The protective wax paper is removed after the heating process.  A thin film of silicone is revealed on the back of my painting. 


With the silicone ironed onto its back, the painting is now placed face up onto the plastic pane, using the marks that I made on the blue film as a guide.


My heating iron now goes over the top of the painting to melt the silicone that's on the backside.  The discarded wax paper is a used to shield the painting from the iron.  


A couple coats of spray urethane are applied to the mounted painting to help protect it from the elements and also make the transparent border translucent.  My painting will not have a cover glass.

I have made a frame with a slot such that the plastic can be inserted.  It should assume the appearance as a float.


With a light source from behind the painting, it reveals what's behind its back.  Otherwise, it is just a painting of water with a hint of something beneath the surface.


Now you see it, now you don't.

Do you see what I see?


Monday, February 17, 2025

Tail wagging the dog

I did some minor alteration to a recent landscape painting.  I augmented the phthalo blue patch and garnished it with a few dots of  green label#1.  It looked contemporary and yet classic at the same time.

Looked decent.


I normally make my own frames for works of weird dimensions.  For the popular formats I would just buy picture frames when they are on sale.  My landscape painting required a 20 in x 40 in frame.  That means custom made.

Instead of dusting off my miter saw and buying poplar stock from the lumber yard, I thought my painting deserved a proper frame.  I was sure a proper frame would make my painting more "legit".

Off to the local art supply store I went.  I buy my non-Chinese brush related supplies there.  Things like mat boards and cutting blades and gel mediums.  This art supply store happens to have a custom framing counter.

I presented my painting.  I was looking for a skinny black frame (not a cocktail dress, mind you).  The simple classic thin-black-rim frame to house my painting.  I conveyed my wishes to the people behind the counter.  Nothing fancy, just utilitarian.  

This was the printout of the work sheet:


I didn't plan to go in there as a joke.  I had all the intentions of getting a proper frame.  But it wasn't meant to be.

The price quoted me was $1560.  Yes, that was one thousand five hundred and sixty US dollars!  For a 20 in x 40 in skinny black frame.  The customer service person said that without batting an eyelash.

I was speechless.  I must be out of touch.  Really?  I could have bought a skinny black cocktail dress!
Or a shower stall kit!  I was naïve.  I was ignorant. 


I know galleries take a cut of 30 to 40 percent of whatever they sell.  They need to pay utility bills and rent and labor.  I understand.

So for me to recoup my $1560 investment in frame and  based on a 30% commission I needed to charge $2166.

That would be my overhead, just for the frame.

If I was so brash as to dare to ask for $1000 for my efforts, I needed to mark up my painting to $1429 to allow for the 30% commission.  

That meant my modest painting with the "custom" frame needed to seek $3595 in the gallery in order to reward myself with $1000 for my artistry and efforts.  To earn my one thousand dollars I must first cough up $1560 and set a retail price of $3595 and hope some idiot would buy my painting for that ridiculous sum.

Tell me it ain't so.  Please!

Something is not right.  The dog should be wagging its tail, not the other way around.


Tuesday, October 9, 2018

Quorum gets framed

I've been glancing at my Quorum piece for a while now hoping to receive some vibes as to what kind of alteration I could make to render the painting more interesting.  Sadly my antenna picked up no such signals.  Does that mean my journey with this piece ends right here?

Fortunately no!  I've also been eyeing this frame that I picked up rather inexpensively.  This must be an abandoned order from a custom frame shop, but looks perfectly fine to me.  I've been hoarding it just for an occasion like this.


I have something to tinker with now.  I think I can trim my Quorum piece to fit this frame.  I am going to mount my Xuan onto canvas first.  I really enjoy the texture of the canvas showing through paper.

Normally I would build my canvas frame but I recall a foul experience when the canvas frame twisted after the mounting process.  Since this is a rather large painting, I decided to take the safe route.  I bought a piece of  two-ply wood veneer and tailor fit it to my frame.


Then I applied exterior wood glue to the veneer


My OCD is coming through a tad.  I was being a bit pedantic and presumed that this is the perfect way of assuring even dispersion and good bonding.  To my horror the glue did not spread well at all.


And it is drying fast after being spread thin.  I haphazardly dabbed all I could and turned the veneer over onto a piece of canvas.


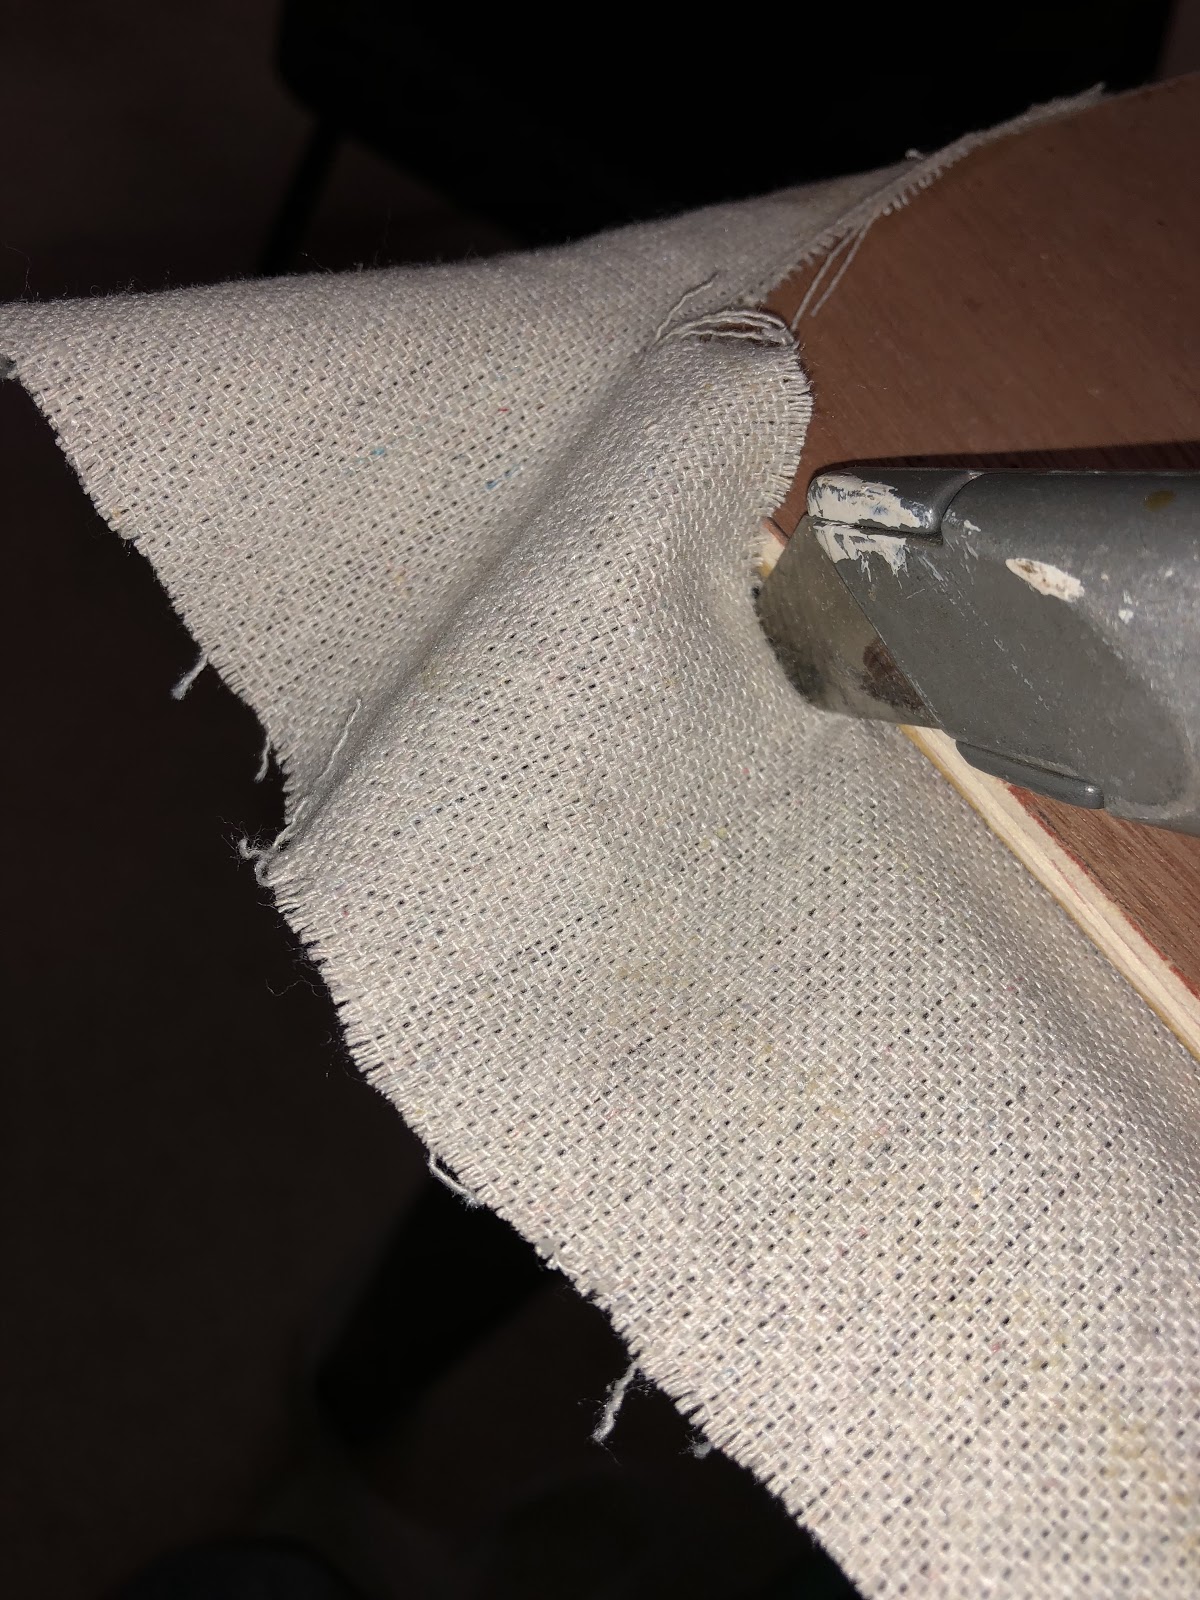
I folded up the edges, pinned them in and put weight on the veneer to prevent it from curling as the glue set.


After the glue is thoroughly dried in a couple of days, I trimmed the excess canvas to the edge of the veneer.


The painting was wetted down with water to relax the fibers


The paper was allowed to air dry to the point when it is considered moist.  This is when all the fibers had relaxed and the paper had regained its tensile strength back so it would not tear as easily during the mounting process.  A dilute solution of starch was used, such that the Xuan could float on the starch a bit and I could brush out any creases and air bubbles.  The lowering of the painting onto the canvas is a two person job and demands a steady hand and nerve of steel.  Disaster beckons if the paper does not align with the canvas, especially with a long piece like this one.  Notice the more saturated tone from the wet paper.


I am thrilled to see the added texture imparted by the canvas to this painting


The taut Xuan paper looked like fabric now


The dried surface lost a little of saturation when dried.  This could be restored by applying gel on the painting to reclaim the vividness and the depth of the color.


Finally, my Quorum gets framed (this picture was taken under halogen track lights, thus the warm color)


Saturday, February 26, 2011

Bamboo Tutorial continued

The painting I took to class was very two dimensional and lifeless.   Somehow it looked like a manikin.  I suppose it was sufficient for instructional purposes.  I figured since I do not paint bamboo that often, I needed the practice.  I ended up with the one shown above.

I attempted with different ink tones to show the spatial relationship of the different stems and leaves.  The bold ink color of the lower vertical stem gave anchor to the painting and helped to defuse the parallel lines.

My painting colleague had this critique............. a weak left flank.

But I had already mounted the painting.  Any alteration now will disturb the sandwiched starch layer and cause the paper to warp.   Oh what the hell, it's only a piece of paper.

Armed with concentrated ink right out of the bottle, and a very dry brush ( really too dry to paint bamboo leaves, but I had few options), I attempted to build on the left side.


One thing is for sure, this painting has more spunk than the one in the last blog.
I had to do another class demo, so I tried my hands at bamboo again.  This time paying a little bit more attention to contrast and harmony.  The more noded stem has denser and adhering leaves, versus the less noded stem with sparse leaves that hang away from the main stem.  More or Less.

Finally, the painting is cropped and mounted on canvas, and I even made a frame for it.


P.S.  For more material on bamboo leaves, please watch video on my blog on Bamboo Leaves and Pronation published on Oct 29, 2011.