Sunday, February 26, 2017

Young Talents

I've been offered another opportunity to share the joy of painting a rooster with a young audience, as part of the Chinese New Year celebratory program.  I felt that I had developed a fluency with my method and since I already had the necessary material, then why not?

I managed to capture some of the paintings for sharing:


A heartwarming experience indeed !

And, no, I didn't find any dragon-moms!

Tuesday, February 14, 2017

Rooster Painting at Cultural Fair

I showed how to paint a rooster in my last blog, and I am happy to report that the scheme worked!

This is what the venue looked like


Here are a few of the examples of the day's work


I honestly don't know who's more happy, me or the participants.

Sunday, February 12, 2017

Demonstrating Rooster Painting

My rooster painting caught the attention of a few organizations and they have asked me to do some demo sessions for them, as part of the Chinese New Year celebration.

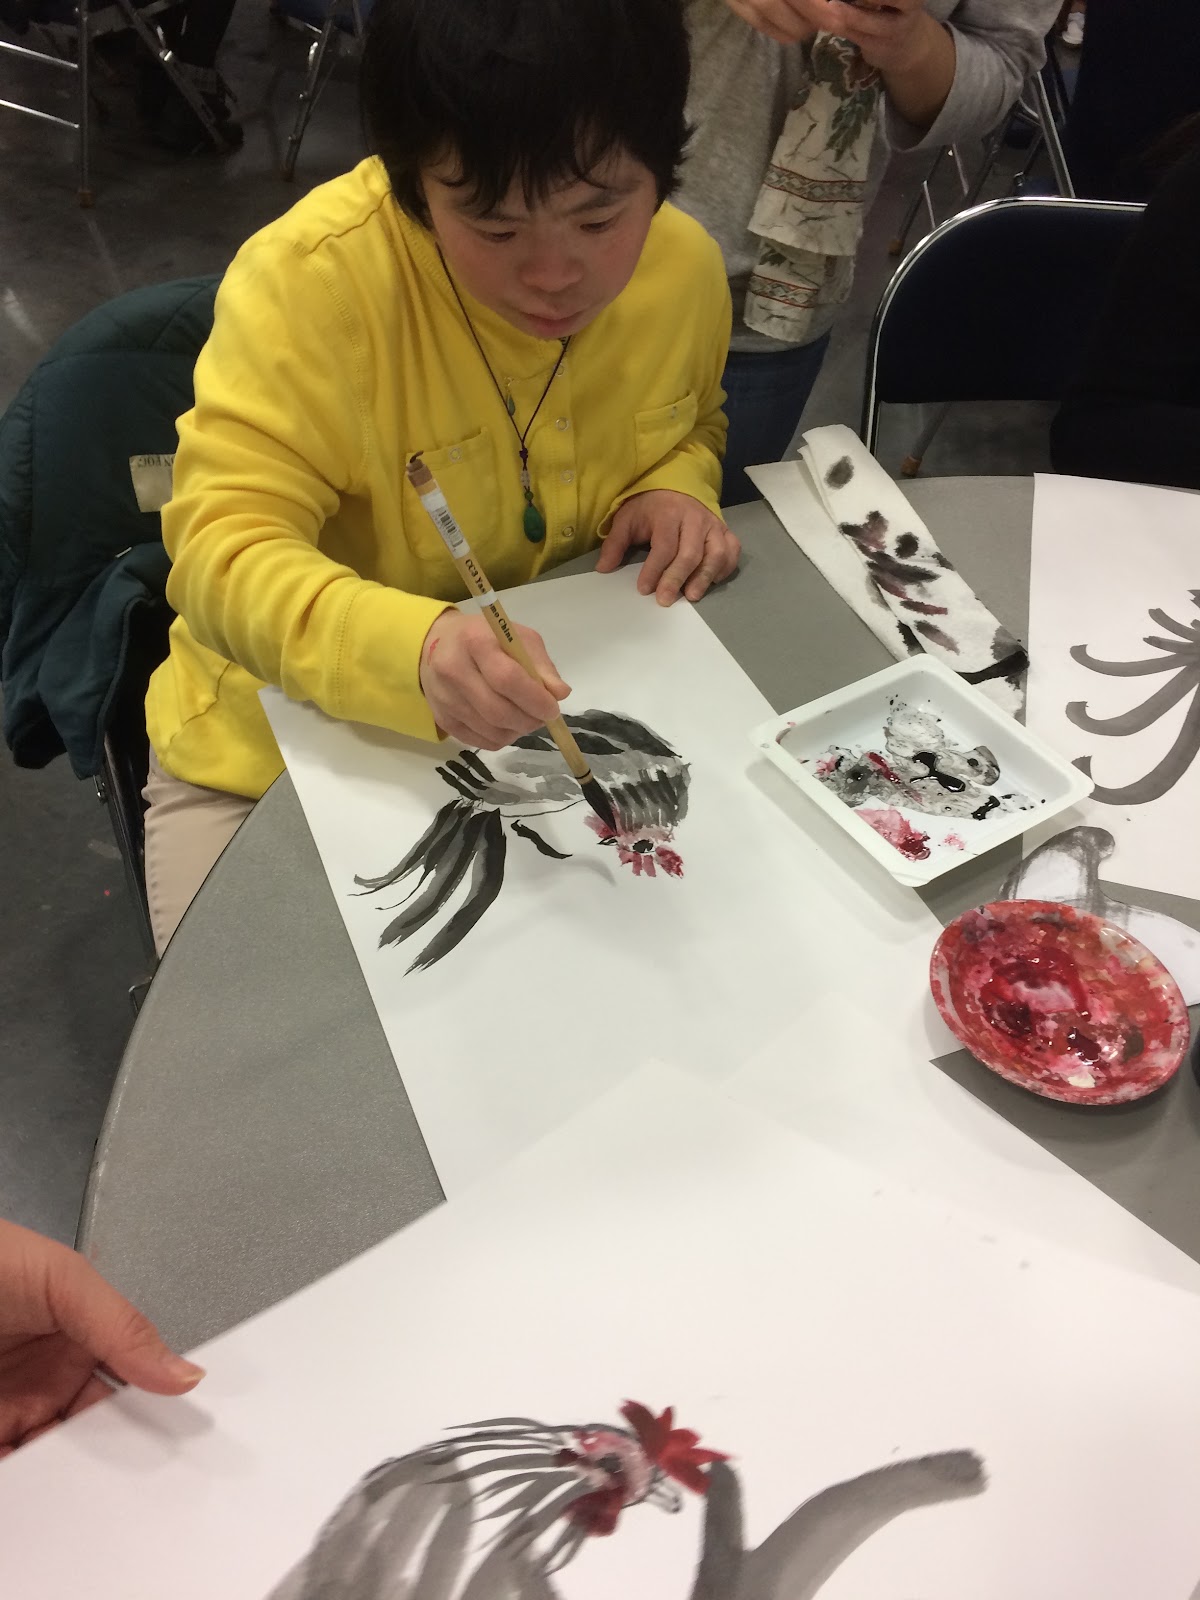
One of the organization is putting up a Cultural Fair and I was invited to man a booth to show people how to paint a rooster.

I entertained the original proposal of painting a rooster for the visitors as they drop by my booth and rejected that idea rather quickly.   I didn't want to be a face-painting-ish event for me.   Not that I have anything against people who do face paintings, but I had the vision of being a tutor who will show people how to paint a rooster.  I envisioned that visitors would have some hands on experience and paint their own roosters, and get to keep them as their own painting.  I wanted a participatory venture.   I wanted people to share the joy of painting and the satisfaction of making a painting, regardless of whether they know how to paint or not.

For this I need to devise a fail safe method.  One that would work for 6 years old, as well as 60 years old.

I created a whole bunch of stencils, such that visitors could trace these templates onto their drawing paper.


The stencil ensures a basic shape for the visitor to start out with their painting, and takes away the apprehension that associates with many first-timers.


A traced outline from the stencil


For the sake of simplicity, I decided to use just ink and a single color red for the rooster.  Red is essential because it is the auspicious color in our culture.  We can't celebrate a new year with the color red.
First order after establishing the basic outline is to add in the beak and the eye.


Now paint in the neck feather


Now load the brush with ample water and ink and write in the feathers on the chest and body using discrete dabs


Write in the leg


Complete the toes and the leg in the back which is curled up


Tie in the leg to the body with additional brush dabs


Write in the big rooster feathers


Using red color, begin to write in the comb


Completed rooster with wattles, ear lobe and face.


I shall be putting this to practice pretty soon.


Monday, February 6, 2017

( NO ) Strings attached

Two of my paintings needed mounting and framing.  They got juried into an exhibition.  One of those was the one I named Oblivious; the "have eyes but won't see" painting.  This was especially uplifting, as I felt vindicated, after being rejected twice by other venues.  I was told by the curator that the reason for rejection was "the faces are not familiar to the west".  I didn't know I was signing up for a course in Bovine Scatology!  On the other hand, it exemplified the caliber of the show!  Might as well!

Again I mounted them in the Suliao Xuan Ban fashion, and again I stained my frames with the same ink I painted with to achieve that tonal continuity between the painting and the frame.

I devised a new method to combat the bubbles that popped up under the paper.  This was probably due to defects in the silicone layer.  I used a stress ball as a roller to help tamp the Xuan onto the heated silicone surface.  The ball was very pliable and made even contact with the surface when pressed.  The added bonus was that I got to massage my acupressure points in my palm (wink, wink).


I modified my hanging string this time.

I had used the regular metal picture wires before for the cross string.  That was until my confidant pointed out to me that the wire was visible through the clear margin that I had painstakingly designed.  My reason for that clear margin ( in lieu of a traditional mat) was to exaggerate the float effect of the painting.  I also wanted to free the painting from the immediate enclosing feeling of the frames.  So after having these thoughts executed into the design of the setup, I ruined it by allowing the viewer to see a metal wire through the acrylic pane. That was more than a fly in the ointment.  This is a mistake that I often make.  I am always in a hurry to finish a project that I would not think through the last few steps.  I will write these steps off as being incidental and trivial and not critical.  I just have no patience; too eager to call it done.  That's the bane of my life.

To make the hanging wire less visible, I thought of the leader system of fishing hooks, harking back to the days when I would ford the streams and fish a little bit.  I would use the regular metal hanging wire, but instead of the entire length, I would tie both ends to clear fishing lines.  This way the clear fishing lines were under the clear acrylic margin, and were not readily visible.  The reason I did not use fishing line for the whole length to begin with was because the length of the wire was too long in the landscape setup.  The weight of the wood frame and the plastic caused the wire to stretch too much, resulting in the hanging hook visible above the frame.  That destroyed the presentation.  I wanted to frame to just appear on the wall, without any obvious means of hanging or attachment.


I drilled a 90 degree angled passage in the narrow wood frame and passed my fishing line through that.  I then tied a huge knot;  one that was big enough to not slip through the tiny hole, thus securing the line.  I then tied the clear fishing line to the metal hanging wire.  The beauty of this design was that no hanging hardware was required, and the hanging hook would be hidden by the painting itself.


This is how the finished product looked on the wall.
 No visible hooks or wires!