Friday, May 15, 2020

Application of lotus leaf Chuen

The lotus leaf chuen is one of the methods used to depict a particular feature in traditional Chinese landscape painting.  As the terminology suggests, the chuen describes undulating ridges and gulleys that fan out like the veins of a lotus leaf on the slopes of a mountain.   Here is a page from the venerable Mustard Seed Garden on that topic:


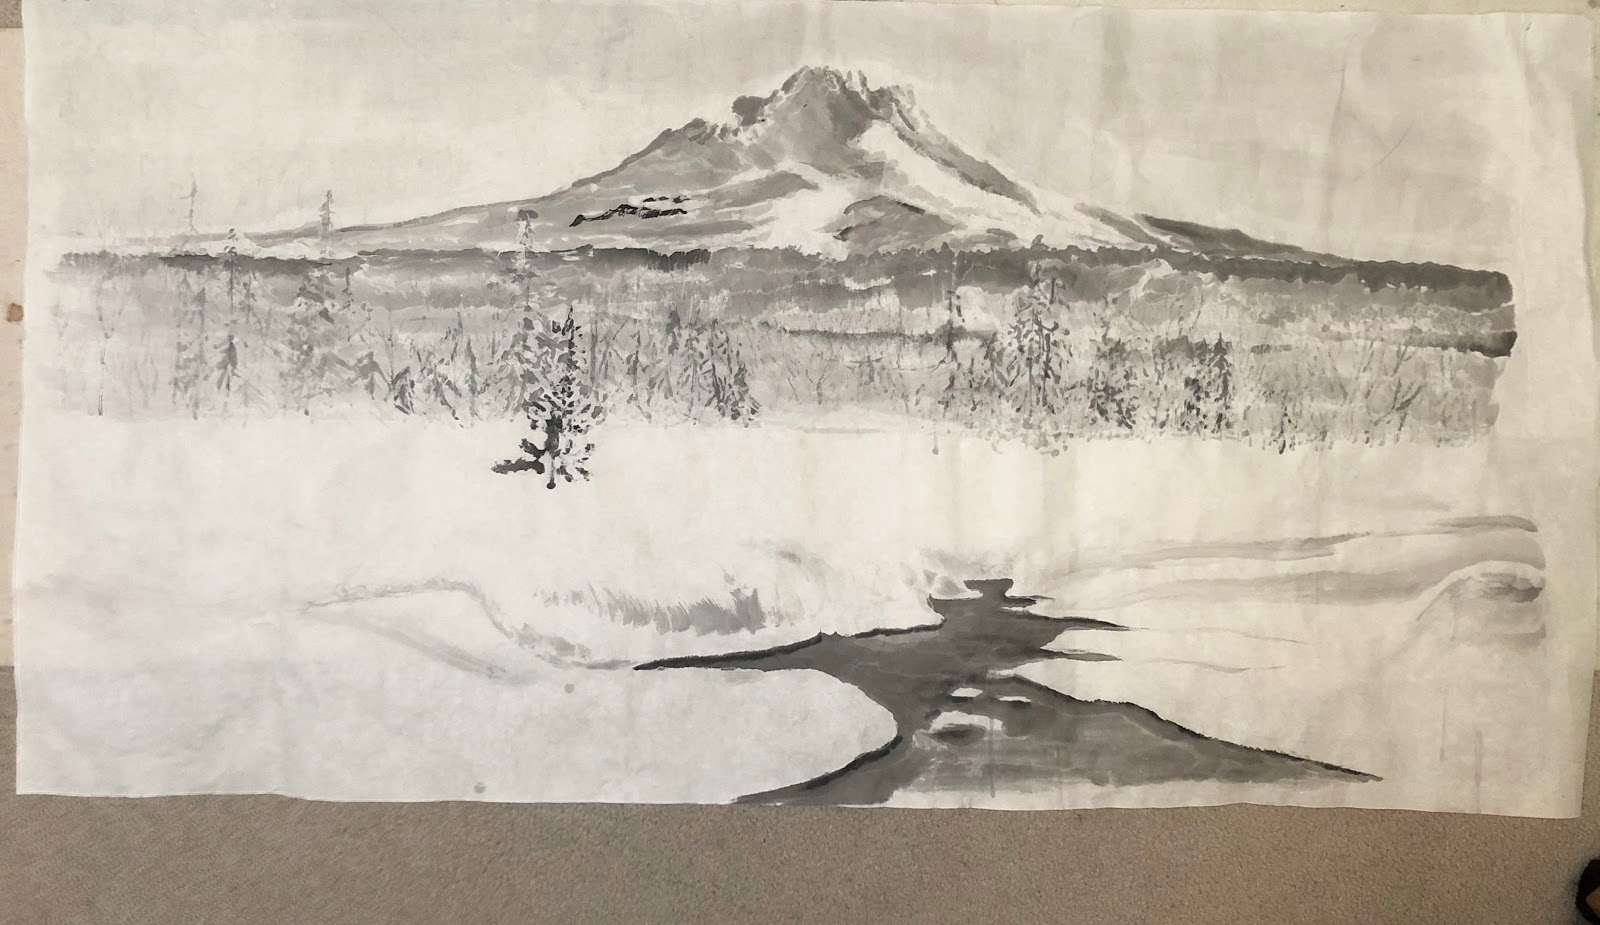
One could see this feature quite prominently from a picture taken of a mountain range from the sky


and my painting highlighting that feature:


So my new plot is to do a black and white painting with a heavy emphasis of the lotus leaf chuen.  For this exercise I am going to continue my experimentation with the alum solution.

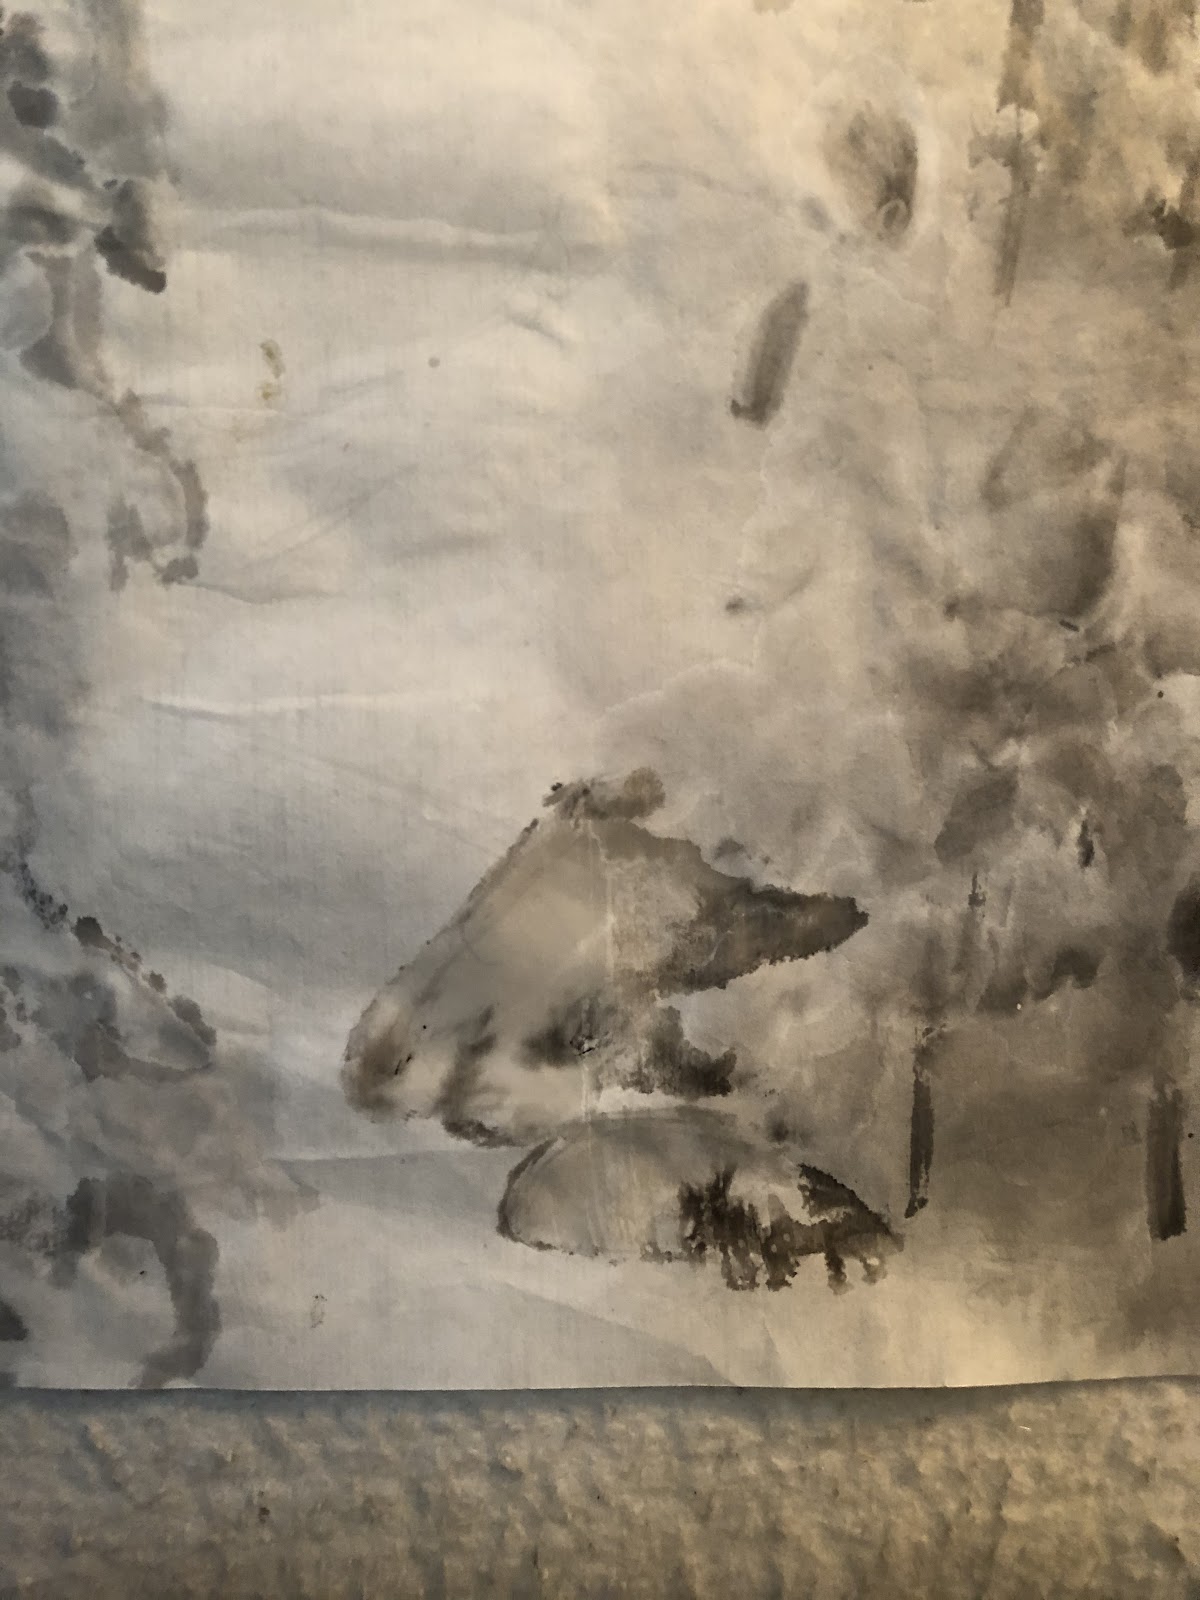
I begin to paint on the back side of the Xuan, painting in my highlights with the alum solution.  Obviously the point of doing that is to be painting on the top side of the Xuan eventually, and allowing the alum solution to mark the brightest areas, i.e. the ridges.


The trees might look whimsical to some viewers, but this method of rendering is actually quite common in traditional Chinese brush painting.  The mountains while exemplifying the traditional style of lotus leaf chuen, exhumes little hint of a Chinese brush painting.  So yes, I am toying with the contrast not only of dark and light ( ying and yang), but also of perceived styles of painting.

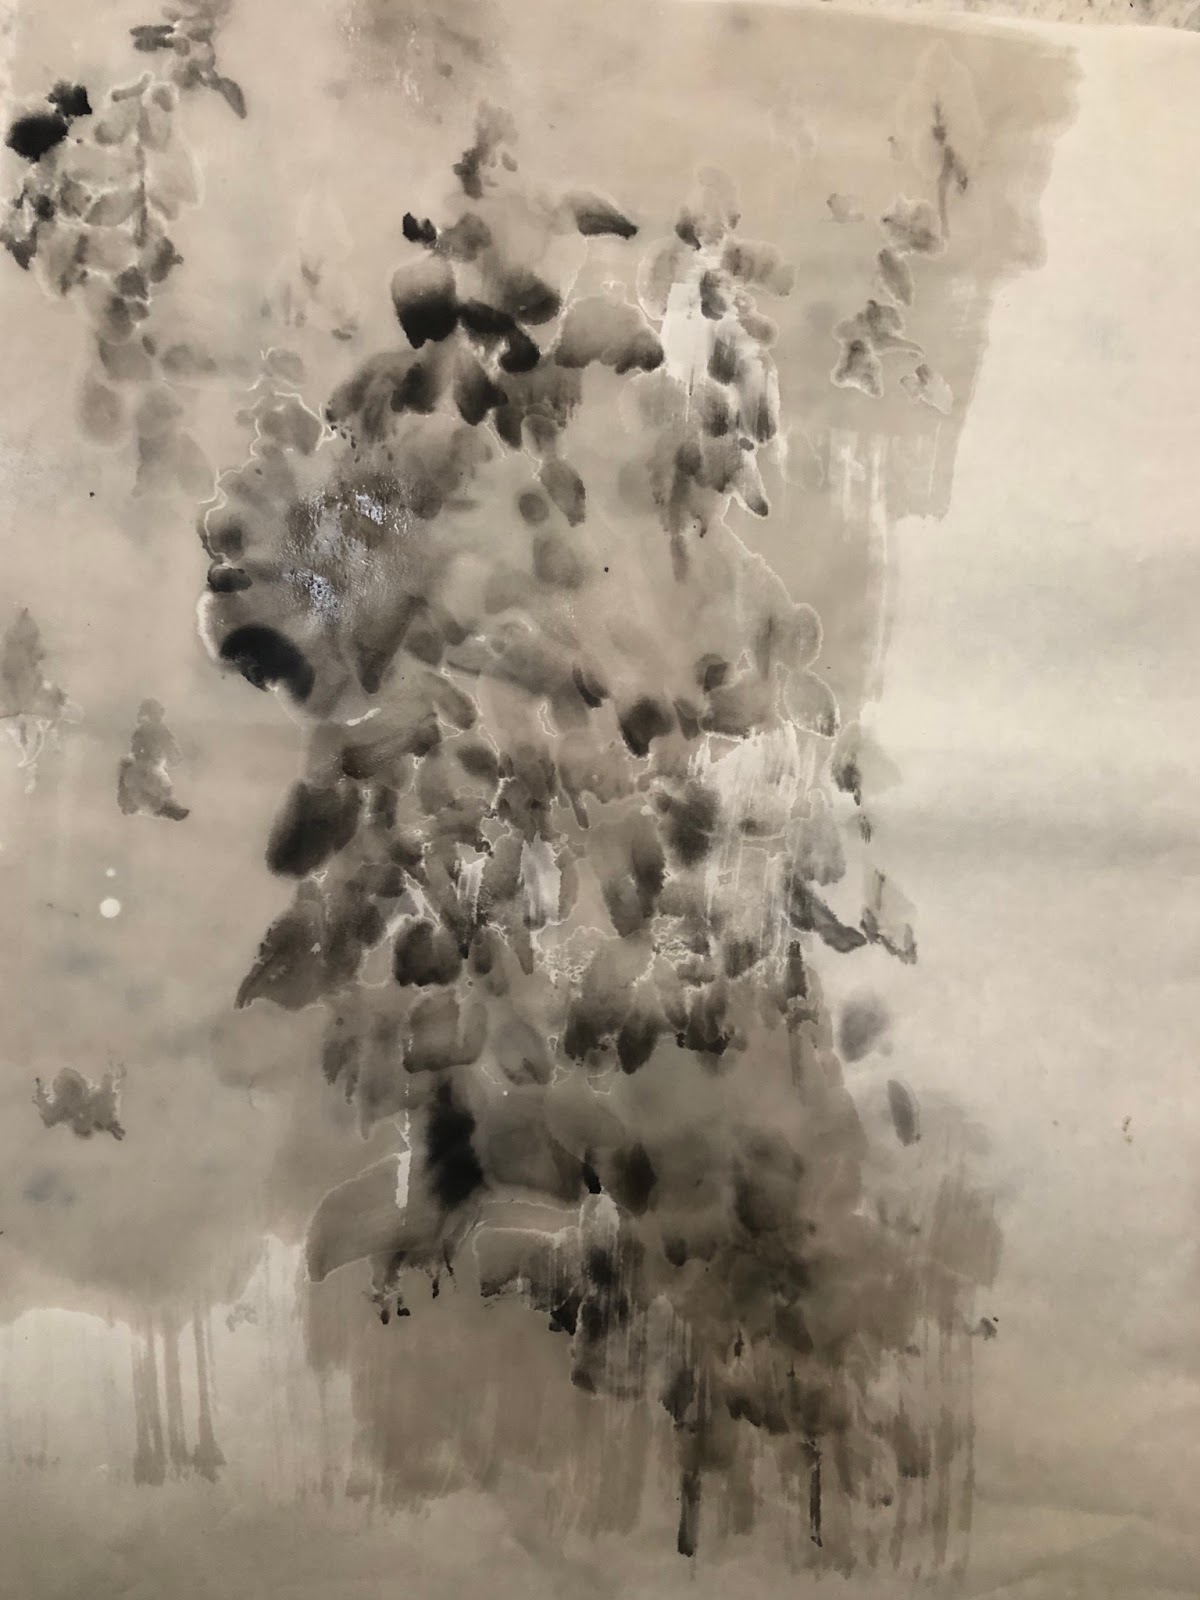
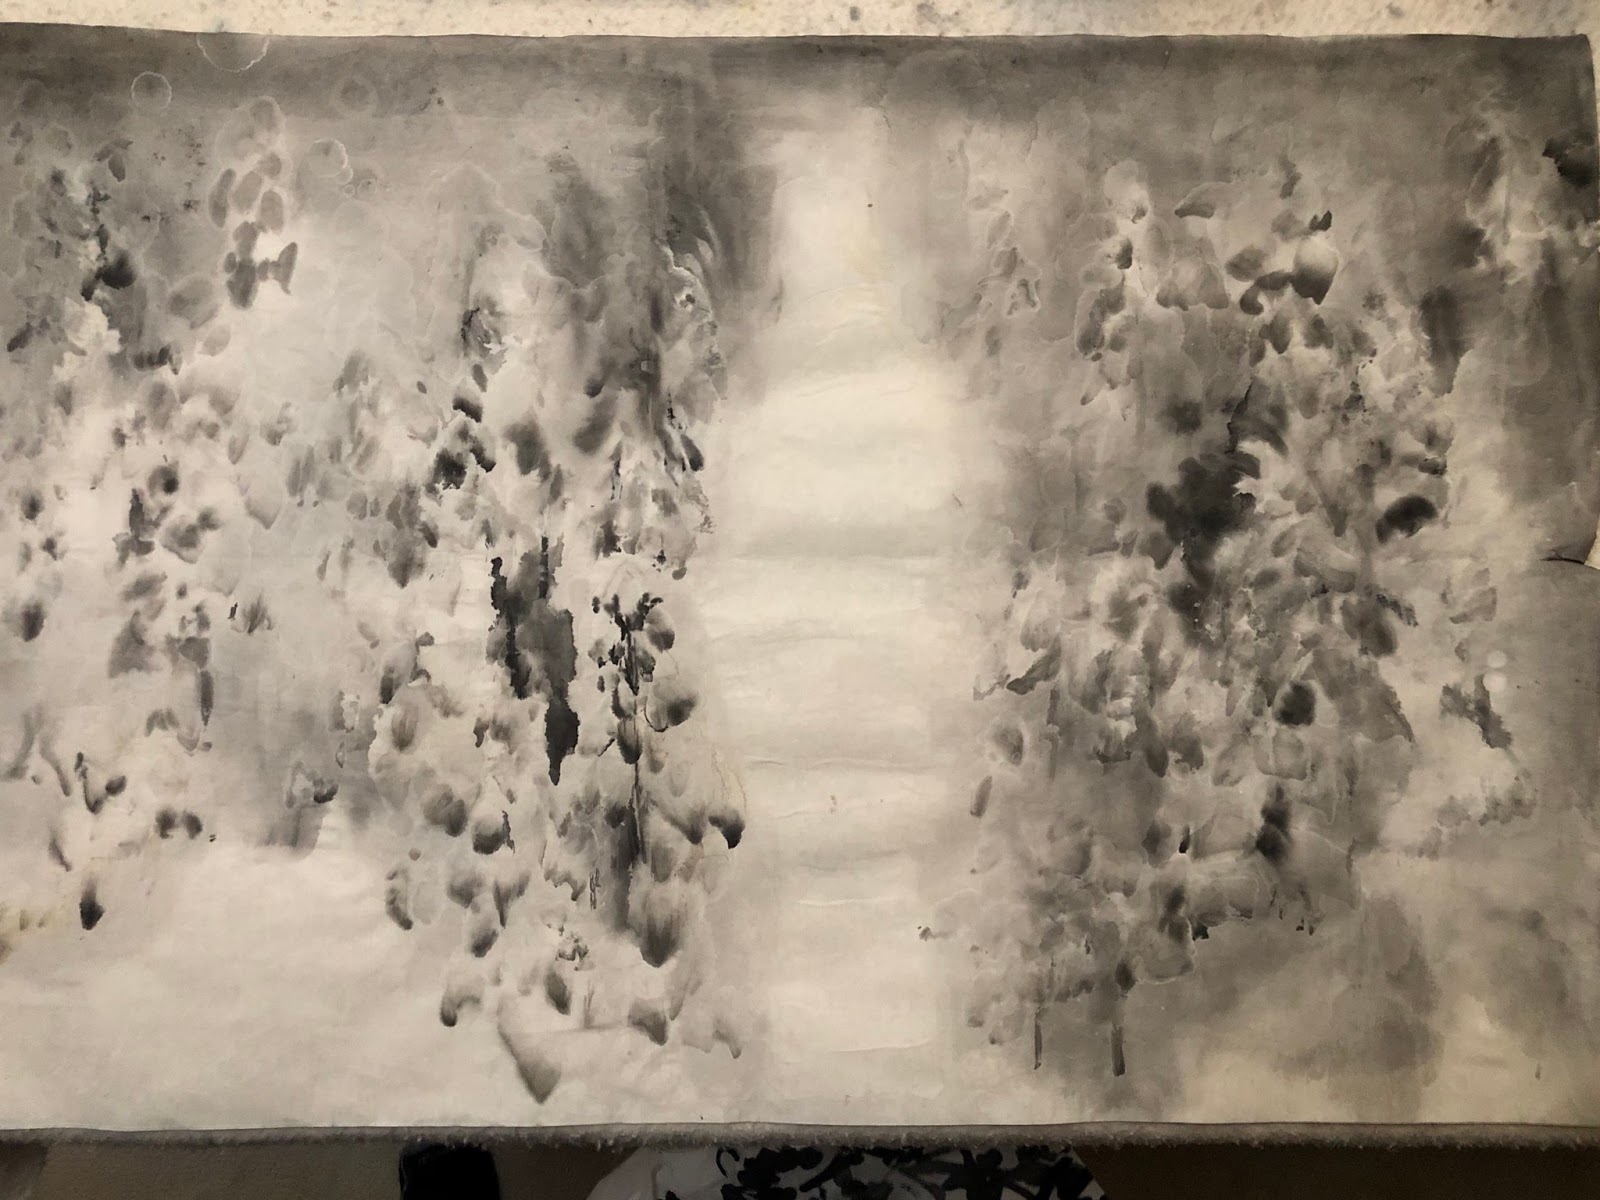
The top side of the painting shows a subdued black level with mottled look


Working from the reverse side again, the light side is kept light to maintain the contrast with the much darker adjacent land masses.  I use a hair dryer to dry my brushstrokes before the ink has a chance to migrate.  I am trying to keep and preserve the harsh, rigid attributes of the mountain ranges.  I short, I am not looking for a soft, diffused appearance of my landscape.


Flipping my Xuan over, I am now looking at the top side


and now I can pick out the various spots on the painting that requires better definition 


The brushstrokes done with alum solution on the back side help to impart a look of discrete stained patches on a piece of fabric.  They are well defined and not dreamy at all.

Saturday, May 9, 2020

Finishing my mountain painting

One of the unforeseen merit of the Covid-19 lockdown is that I have less distractions while confined at home.  I could only watch so many movies or run in place for so long without getting utterly bored.  It has given me a great opportunity to do the post production after the painting is done.  This is all technical and craftsmanship, nothing artistic, so to speak.  Yet the concentration it requires is a great respite from the hounding news I hear everyday.

I decided not to mount this piece on plastic or canvas.  This piece is 4 feet wide and frankly I am running out of room to display and store these larger pieces.  Mounting it the traditional Xuan on Xuan way allows the finished piece to be rolled up for storage, or displayed in a frame if needed.  It offers versatility.

Xuan on Xuan mounting involves starching a backing to the original painting.  The resulting bi-layer is then glued to a flat surface.  The process adds rigidity and provides a white balance to the painting.  The wet, starched bi-layer is allowed to dry slowly at ambient temperature and the drying process shrinks the Xuan fibers.  The backing and the painting thus pull themselves taut during the drying process, returning a perfectly flat and wrinkle free painting. 

If done right, that is.  And this is where technical know how and craftsmanship come into play.

First of all, I needed to find a large enough flat surface for me to hang and glue the 4 feet long wet painting.  I recruited a door for this purpose.

I applied masking tape on my door, around the destined parameter of my painting.  Since the painting and its backing will be glued to the door for drying, I don't want my door to be defaced by the glue, or starch in this case.  The masking tape shall form a removable barrier between the starch and the door .


My painting sat face down on a flat piece of plexiglass, starch solution covering the entire back surface.  A blank piece of Xuan, slightly larger than my painting was used to cover the starched painting.  A stiff palm husk brush was used to brush on the backing and helped to eliminate wrinkles.


The backing Xuan was wet with starch from the painting and turned transparent, revealing the painting it covered.

Layers of newspaper were then placed on the starched layers.  They served to soak up excess water from the starching process, and to protect the layers from the hard pressing and pounding by a beefier palm husk brush.  The pounding was performed to guarantee good adhesion between the painting and the backing and to pound out air bubbles and small wrinkles.


Peeling back the moist newspapers to reveal the totally flattened and well adhered backing and painting


Starch was applied along the border of the backing, and the entire assembly was taken to the prepared door, glued in place along the edges of the backing and allowed to dry.


Notice how saturated the painting looked while wet.

After a day, the backing with the painting was totally dried and appeared totally flat, as if ironing was done on it.  Now it was just a matter of cutting the painting loose and releasing it from the glued edges.

The door was left with the remnants of the backing and the masking tape.  Peeling off the masking tape revealed a totally unmarred door.


At last I have something to show for my weeks of laboring.

Thursday, April 30, 2020

Cleaning up my mountain


Taking another look at what I've got so far.  Trying to see it from the point of view of a spectator and improve anything that doesn't make sense.

As my painting involves a snow scene and the fact that I am playing with alum solution, I must find areas in the painting that I can accentuate the feeling of snow.  One of such places is the lone tree in the snow field.  By darkening the areas around the horizontal branches, I bring out the contrast between the ink and the spots painted with alum.


I pick out strategically located conifers and go over them partially with darker ink.  Since the original footprint was done on the back of the paper, this add on ink from the top side creates a subtle effect of shadows and adds thickness to the object.


I must confess, this is a lot of fun, meeting the challenge of finding new ways to express with ink.

It is time to describe the foreground, the snow field.  I had laid down a few lines to divide up the flat space when I painted on the back of the paper, so it is merely a matter to make some sense out of those lines.


Using a bigger brush, I use a very light ink to paint in the areas in the shade.  Bearing in mind constantly that the brightest area, or line, is the high part of the field where it catches light.  The dark lines that I painted before effectively defined the contours and undulations of the otherwise flat piece of white.  


The plain expanse of white is transformed to the banks of a creek, drawing attention to the mountain in the yonder.


When dried,


I place my surplus frame over my unmounted painting.  I am just eager to see what it looks like


It seems to me that the sky and the snow are too close in values, so I need to make the sky darker.  After all the snow should be white, right?  


As I lap on a darker tone of ink the sky, some previously alum painted tree branches emerge.  This shows how nicely the alum solution worked.  It is apparent that I was overzealous in my original planning,  I had the trees taller than the present setup.


Now I think this is a little easier on the eye.

I recall a piece I did some years ago


I did this piece in a class that I taught.  I was showing my students how to employ the Lotus Leaf chuen technique.  I wanted my students to think outside the box, the fact that a classical Chinese brush landscape technique may be utilized in a non-traditional fashion.  I borrowed the effect of contrast to create the illusion of a protruding snowy peak.  The very dark background and the highlight patch on the flank of the peak made a stunning visual effect, albeit a technically much simpler piece done hurriedly in class as a demonstration.

It is interesting, and retrospective, to compare the 2 pieces of a snowy peak.  For me, it seemed much easier to define with color; perhaps it is the way we are hardwired to do.  It seems a more direct circuit for our brain to process color information as it relates to objects, thus emotions and consciousness.  The color piece that was done in a matter of minutes without too much effort carries as much drama as the black and white piece that I labored for days and weeks, at first sight anyways.  Perhaps this is a statement for the merits of spontaneity and extemporaneous creations, yet the black and white painting harbors so much more information.  It is like an onion with so many layers to peel off.  To truly appreciate it, one must read it like a book; sentence by sentence, page after page; hence brushstroke by brushstroke.

Wednesday, April 22, 2020

Continue to trek my mountain

Had a chance to let my mountain dry thoroughly.  Some of my obligations got in the way at the most opportune time and forced me to give the painting a rest.

It's time to flip the paper over and see what I've got.


Not too bad.  Looks a little subdued.  First of all we are looking at the back side of the paper.  Whatever shows up now actually is what comes through from the other side.  Secondly the alum solution acts as a resist and helps to shield the tone somewhat.  Also because the alum fixes the ink
rather quickly, the ink does not have a chance to migrate, creating the different tones naturally.  That's why the painting looks a little flat and languid.

My first order is too ever so slightly give the sky a wash of light ink.  The darker sky helps to define the contour of the mountain and brings out the snow pack.


Next on the to do list is to work on the shading of the mountain a bit.  The mountain is meant to be a backdrop so I don't want to exaggerate it to much.  I just darken a few places to bring out the features of the mountain and let its majestic stature speak of itself.

It is a presence after all.

I proceed to use dark ink to bring out the foothill woodland.  This is going to be my darkest value and it should work as a good contrast against the mountain and the sky.

I plant my trees along the ridges of the foothill to bring out the elevation and to add perspective.

This is when the previously painted areas with alum solution reveals its magic.


Notice the mottled look in the dark areas. Do you not sense the suggestion of branches and tree trunks and snow?    So these are the areas I must protect by not overworking it.  I don't want to lose this quality.  I have come to realize the reason I did not have too much success in the past.  I was too much in a hurry and tried to lay on the darker tone before the alum had a chance to dry.  The fact that I am forced to stop messing with the painting for a couple of weeks allows the solution to cure and makes a mellifluous partnership of ink, paper and alum.  Eureka.


 Taking care to preserve the occasional white patches through the trees, the painting is gradually taking on a personality.

Thursday, April 2, 2020

Conquer the mountain

I am having so much fun experimenting with my Ancient Secret Chinese Solution that I am constantly searching for appropriate subject matters to paint with.  Somehow I am obsessed. 

I had fun with the snow contrasted by the dark water.  I thought it looked stunning.  My new project must involve snow and dark water.  How about placing a snowy mountain with the foothill woodland in the background for good measure.  A screen saver used by the local Public Broadcasting audio channel fit the bill perfectly.  I'll paint that.

A horrible thought came to mind.  A small painting was not going to emanate the aura of a grand landscape.  I should try something bigger perhaps.

Luck will have it that I bought a surplus frame for very little moolah and it measures 4 ft x 2 ft.  My Xuan stock is 54 in x 27 in ( notice the 2:1 ratio ) so I have no problem with the raw material.
Armed with the new found curiosity and confidence, and perhaps a little arrogance, I started my painting.

My big painting.

I shall start from the foreground and work my way to the mountain in the back.  I shall be using the alum solution to depict snow.  Thus instead of leaving a void I am actually painting the void spaces too, albeit with the clear alum solution.  What I am going to do a little differently this time is to paint everything on one side of the paper first instead of constantly switching from front to back etc.  I ended up confusing myself since I liked the effects from both sides of the paper.  After I am done with the one side, I will flip the paper over and work on the back side and make my call after everything is done.

So the foreground is basically a large spread of flat snow covered ground with a stream running in the middle.

I painted in the left bank of stream, creating a few slopes to add interest to a otherwise flat feature.


Placed my right bank, using a little ink to create shading, giving the bank dimension.


I finished constructing the banks of the stream.   I wasn't going to do anything to the rest of the snowy plain, since it was going to be white.  I folded a crease in my paper and that would be the edge of the woodland at the foothill.

Time to conquer my mountain.

I began by writing in my snow using the alum solution.


I used a smaller brush because I wanted to make smaller lines, wanting to add texture to the snow.


With my brush soaked with ink and alum solution, I started my tree planting exercise.  The creased line in the paper facilitated in the positioning of the trunks.


Took the opportunity to write in many dots with the alum solution.  The plan was to have these dots appear as lighter than the surrounding, giving an air of snow cover on leaves and branches. 


Using a darker ink, I filled in the stream.


It was interesting to see the darker ink tried to obscure the alum solution painted snow, but only partially.  I seemed to have found a way to express submerged snow or ice.


Using different tones of ink now, going over the areas of the mountain and the woodland, I brought out what was hidden beneath the ink tone.


Friday, March 20, 2020

Continue with my alum solution painting


After further treatment to the background to make the white pop a little bit more and decided that this is the side I preferred as the top, I arrived at a point when I was ready to paint my elk in the middle, as I did the last painting.

But then I noticed the void at the bottom left.  I needed to address it.

Should I treat that as mist and paint that accordingly?  If it was mist, I would have liked it to appear at a few more locations to permeate the entire woods.  I looked for additional locations where I could plant my vapor.

I struggled with that thought for a few days and decided against it.  I wanted something fresh.

Let me transform that corner into a riverbed.   I could say that the trees ended at the banks of a river or a creek.

Using alum solution I painted in the bank, flanked by rocks and boulders in the middle of the stream, again covered with snow.


 I decided to use ink to represent the water ( at night, in the dark?).  I enjoyed the contrast of the dark water against the background.


The effect was pretty stunning visually, I told myself.

But this attempt had me discombobulated, sort of.  The bottom left drew so much attention now and seemed disconnected with the rest of the painting,  especially the vertical void in the middle.  The path I had allocated seemed out of place now.

My remedy was to extend the water into the middle of the painting.  I painted in a couple of rocks to establish the other bank of the water.


Again using ink to depict water, I extended my river across the middle, and the tree at the center became the foreground, partially blocking the view of the water.  Working from the back of the paper I took out the path in the center by painting in more trees, and tried to hide the rest of the voids as an amorphous vapor.


So now my painting became a snow covered woods along a river or creek.  This was very different from what I had planned originally.

I was not ready to give up my animal.  I thought I would try a different species.

How about a mama black bear with her cubs?  That would be cute.  If nothing else, they could make the painting more personable?


It should be clear by now that the way I employed the alum solution was to exploit the way it interacts with ink and Xuan.  I should also make it succinct that I was using both sides of the paper during the course of the painting, to the extent that I often get confused myself and couldn't decide which side showed more nuances.

To illustrate my point, I hung my painting against a window and took pictures of both sides:


In the end, this one gets my nod.


Tuesday, March 10, 2020

More Alum

Having time to step back and re-examine my last painting, as I was having problem deciding which side would be my "top side", I've decided to display the animal with its head pointing to the left side of the paper.


I prefer this orientation perhaps due to the slight slant of the road edge, giving the frame some direction, for which the animal is responding to.  It's hard to say;  it's just a feeling.  I also thought that the straight lines of the lodge pole pines are less obtrusive.  The same lines seemed a lot darker on the other side of the paper;  perhaps that was the side I painted on.  I am thus in effect looking at the back side of the painting now.

Looking at what I wrote in the last blog, this is exactly the case.  I started the painting by painting the elk with its nose pointing to the right of the paper.  I am therefore using the back side of the painting as the top side now.

I am having second thoughts about my added brushstrokes to the snow covered path.  My intent was to describe the undulating surface of the road but I fell victim to the equally spaced rhythmic strokes of my brush.   Instead of random irregularities of the road surface, I've made it out to be a mogul jump event now.  I regret that I've over-produced this piece of work, as a sound engineer might have said.  Whereas at a sound studio one could take attenuate or even delete individual tracks, that luxury is non-existent here.  Oh well.

So I thought I would give painting with alum another try.  It was definitely excited about exploring the nuances of painting with alum.

For this attempt, I decided to be a little bit more methodical.  I wanted to paint the same scene, but instead of placing a lot of dots and dabs of alum solution, I tried defining each tree.


Basically I was treating the snow laden branches as petals of a flower.


Using a light ink wash, I covered what I have laid down to help reveal the white patches and margins left by the alum solution


The back side of the panting after the initial ink wash


The alum solution in the brushstrokes helped to fix the ink before it migrated out too much into the Xuan, and also made the paper less permeable to future coatings of ink.  Thus by judiciously manipulating the tone and placement of additional ink, the appearance of snow was achieved.  


The above was the side I painted on.  

Picture below was the the back side of the same painting.  A little bit subdued and dreamy when compared with the painted surface.